Simplified Docker and Database Setup on CentOS: Comprehensive Tutorials for Installing MySQL, Oracle, MongoDB


Caution: This post will be extensive and may pose challenges for beginners to complete.
In this post, I will cover the following topics:
VMWare Installation
VMWare Installation Configuration
Docker Installation on CentOS
Windows Firewall Configuration
MySQL Installation on Docker
MongoDB Installation on Docker
Oracle Installation on Docker
VMWare Installation
VMware is NOT FREE and is typically used in production environments. If you're looking to practice, I recommend downloading VirtualBox, which is completely FREE. Although they have similar functionalities, I've found that the free version of VMware is not as well maintained.
Download the VMware Workstation Player installer suitable for your operating system (Windows or Linux).
VMWare Workstation Pro:
https://www.vmware.com/products/workstation-pro.html
VMWare Installation Configuration
File > New Virtual Machine

Then you will see this

custom
I will install the operating system later
Linux
NAT (if you don't know what this means, read below)
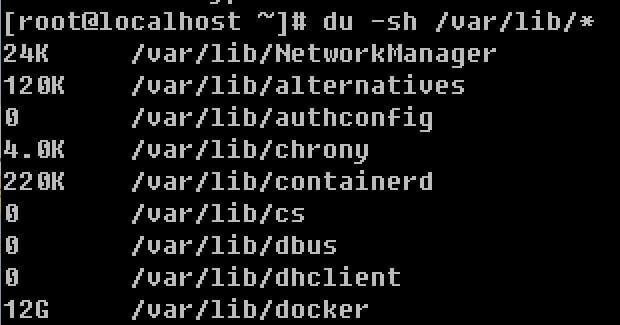
Disk Size: 200GB. It's okay to set your disk size to be larger than what you currently need because your disk space will only increase gradually as needed. If unsure, 200GB is a suitable default size. Docker is about 12GB. I didn't want to know that sizing up the disk later could be so much more complicated...so be generous!
manual DHCP
Press the button to launch.

ssh configuration
vi /etc/ssh/sshd_config

PermitRootLogin yes
- Check network settings
ipconfig /all
# check 아이피(inet), 넷마스크(netmask), 게이트웨이(broadcast)
# DNS
if you are using NAT, then check Wireless LAN Adapter Wi-Fi.
NAT allows your virtual machine to share the IP address of the host system(Your PC) and access the internet through it. When using NAT, your virtual machine appears as just another device on your network, utilizing the host system's network connection.
if you are using bridge adapter, then check Ethernet Adapter.
Bridge mode in VMware connects your virtual machine directly to your physical network, as if it were another device connected to your router, enabling seamless integration with other devices on the network.
Change Network Settings
Now you will change the network-scripts file based on your ipconfig settings.
vi /etc/sysconfig/network-scripts/ifcfg-ens33
TYPE="Ethernet"
**PROXY_METHOD="none"**
BROWSER_ONLY="no"
**BOOTPROTO="none"**
DEFROUTE="yes"
IPV4_FAILURE_FATAL="no"
IPV6INIT="yes"
IPV6_AUTOCONF="yes"
IPV6_DEFROUTE="yes"
IPV6_FAILURE_FATAL="no"
IPV6=ADDR_GEN_MODE="stable-privacy"
NAME="ens33"
UUID="random UUID"
DEVICE="ens33"
ONBOOT="yes"
**IPADDR="192.XXX.XXX.XXX"**
**PREFIX="24"**
**GATEWAY="192.XXX.XXX.XXX"**
**DNS1="203.248.252.2"
DNS2="164.124.181.2"**
IPV6_PRIVACY="no"
- copy the file to the home directory and restart network
cd /etc/sysconfig/network-scripts/
ls
cp ifcfg-ens33 ~/
ls ~/
shutdown now
systemctl restart network
if you can run yum, then the connection is successful
if it doesn't work, then check the settings again
yum update
- Adding ports to the VMWare
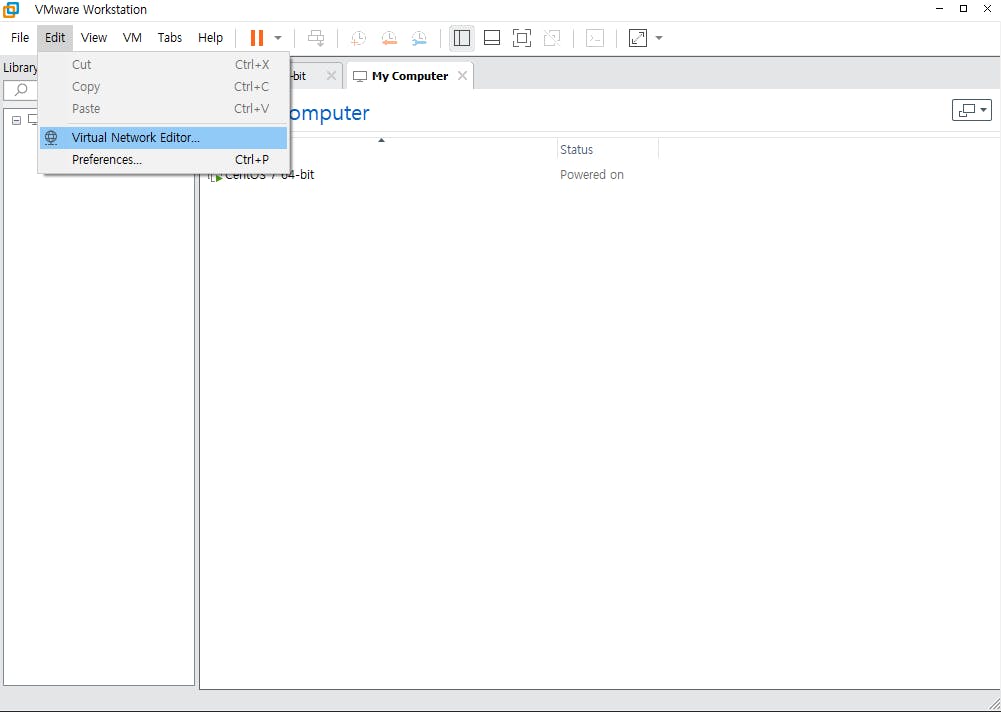

Edit > Virtual Network Editor > NAT 선택 > NAT Settings… > 22 / TCP / IP:22 / SSH > Change Settings
Add the ports depeding on the DB you are using:
22 SSH
27017 MongoDB
5432 PostgreSQL
3306 MySQL
1521 Oracle
Docker Installation on CentOS
https://docs.docker.com/engine/install/centos/#install-using-the-repository
# Install Docker Repository 도커 레포 설치
sudo yum install -y yum-utils
sudo yum-config-manager --add-repo <https://download.docker.com/linux/centos/docker-ce.repo>

# Install Docker Engine 도커 엔진 설치
sudo yum install docker-ce docker-ce-cli containerd.io docker-buildx-plugin docker-compose-plugin
pulling docker images
For Oracle, you can search the docker images. I choose the one with the most downloads. You don't need to choose the same one. You will need to check the official documentation page to configure for any oracle images.
MySQL: docker pull mysql
MariaDB: docker pull mariadb
PostgreSQL: docker pull postgres
MongoDB: docker pull mongo

oracle: docker search oracle-xe
docker pull gvenzl/oracle-xe
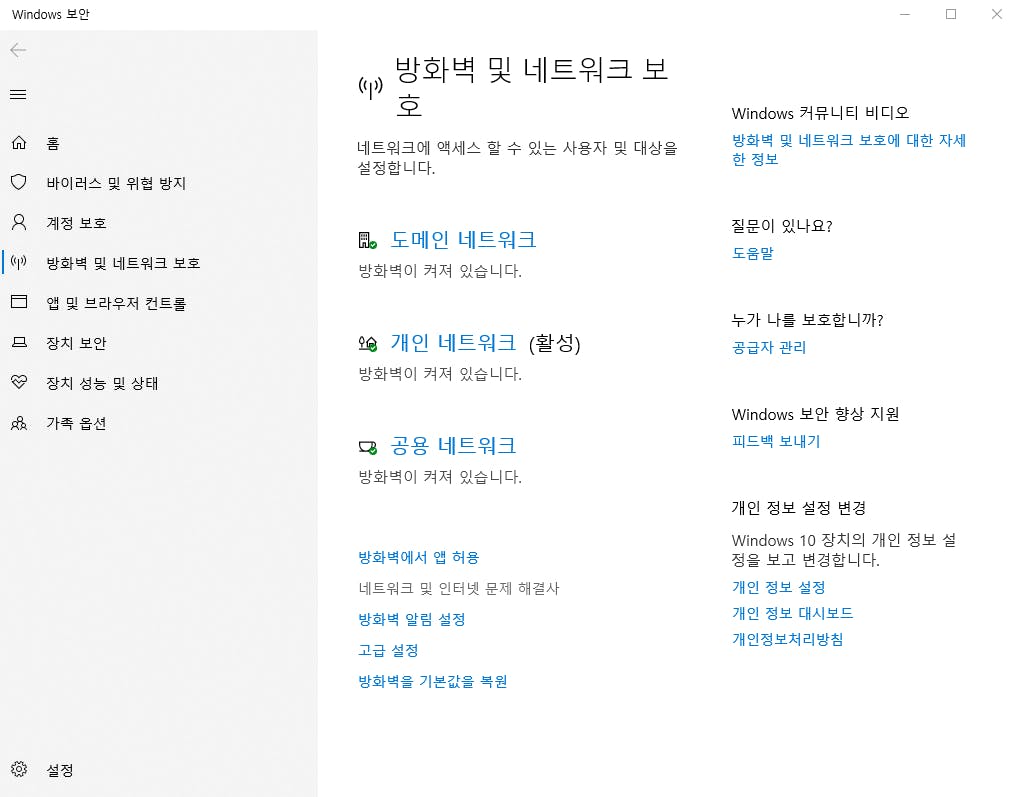
Windows Firewall Configuration
- This section is intended for Windows users only. Windows typically sets up a firewall automatically, so we need to allow ports through the firewall.
#Korean
고급 설정 > 인바운드 규칙 > 새 규칙
포트 > 특정 로컬 포트(S): 3306 > 이름: mysql

#English
Advanced Settings > Inbound Rules > New Rule
Port > Specific Local Port(s): 3306 > Name: mysql
MySQL Installation on Docker
# /tmp/my.cnf 파일 생성
[mysqld]
bind-address = 0.0.0.0

# 최초 생성
docker run -p 3306:3306 --name mysql-container -d -e MYSQL_ROOT_PASSWORD='리모트 서버 비번이 아닌 도커 내 MYSQL 비번 지정해주기' -v /tmp/my.cnf:/etc/my.cnf  mysql

# 3306 포트 연결 확인
netstat -ntlp
Active Internet connections (only servers)
Proto Recv-Q Send-Q Local Address           Foreign Address         State       PID/Program name
tcp        0      0 0.0.0.0:3306            0.0.0.0:*               LISTEN      8630/docker-proxy

( netstat -ntlp : display active network connections, listening sockets, and associated process identifiers (PIDs) )

# 평소
systemctl start docker
docker start mysql-container

# 실행
docker exec -it mysql-container mysql -uroot -p

# bash
docker exec -it mysql-container bash
- Quick Tip: if you want to see all the commands that you typed, then here it is
vi .bash_history
MongoDB Installation on Docker
# 생성
docker run --name mongo-container -d -p 27017:27017 -e MONGO_INITDB_ROOT_USERNAME=root -e MONGO_INITDB_ROOT_PASSWORD=1234 mongo

# 평소
systemctl start docker
docker start mongo-container

# 실행
docker exec -it mongo-container mongosh

# /etc/mongod.conf 파일
net:
    bindIp: 0.0.0.0
sudo docker exec -it mongo-container bash
mongosh

# 저절로 test 유저로 감
# admin 유저로 변경
use admin
db.createUser({
  user: "root",
  pwd: "password",
  roles: [ { role: "userAdminAnyDatabase", db: "admin" }, "readWriteAnyDatabase" ]
})

sudo systemctl restart mongod
- If you want to connect to a remote server
mongosh "mongodb://username:password@hostname:port/myDatabase"
- Show databases
show databases
Oracle Installation on Docker
Always check the official documentation for any oracle images before writing docker commands.
docker search oracle-xe
docker pull gvenzl/oracle-xe

docker run -d -it --name oracle-container -p 1521:15root-e ORACLE_PASSWORD=your_password gvenzl/oracle-xe

docker exec -it oracle-container sqlplus
- DB installation complete! It's a milestone. Those who have tried installing Oracle manually will understand the significance.