[CI/CD] How to automize deployment with Github Actions
Fullstack developer at your service
ECS 배포에 성공한 프로젝트의 배포 자동화를 해보도록하겠다
사이드 프로젝트의 actions 탭으로 가서 ecs 템플릿을 검색해서 선택한다

그럼 이렇게 자동으로 생성된다!
하지만 여기엔 큰 변수가 있었으니....바로 최신 업데이트 반영이 안 되어 있다는 점이었다. 자꾸 안 되서 공식 깃허브를 가보고 수정했는데 템플릿을 100% 믿을 수 없다는 것을 알게 되었다... 어떻게 수정했는지도 아래에서 설명하겠다
일단 ECS 템플릿은 2022년 9월 기준 이렇게 생겼다
aws.yml
# This workflow will build and push a new container image to Amazon ECR,
# and then will deploy a new task definition to Amazon ECS, when there is a push to the "main" branch.
#
# To use this workflow, you will need to complete the following set-up steps:
#
# 1. Create an ECR repository to store your images.
#    For example: `aws ecr create-repository --repository-name my-ecr-repo --region us-east-2`.
#    Replace the value of the `ECR_REPOSITORY` environment variable in the workflow below with your repository's name.
#    Replace the value of the `AWS_REGION` environment variable in the workflow below with your repository's region.
#
# 2. Create an ECS task definition, an ECS cluster, and an ECS service.
#    For example, follow the Getting Started guide on the ECS console:
#      https://us-east-2.console.aws.amazon.com/ecs/home?region=us-east-2#/firstRun
#    Replace the value of the `ECS_SERVICE` environment variable in the workflow below with the name you set for the Amazon ECS service.
#    Replace the value of the `ECS_CLUSTER` environment variable in the workflow below with the name you set for the cluster.
#
# 3. Store your ECS task definition as a JSON file in your repository.
#    The format should follow the output of `aws ecs register-task-definition --generate-cli-skeleton`.
#    Replace the value of the `ECS_TASK_DEFINITION` environment variable in the workflow below with the path to the JSON file.
#    Replace the value of the `CONTAINER_NAME` environment variable in the workflow below with the name of the container
#    in the `containerDefinitions` section of the task definition.
#
# 4. Store an IAM user access key in GitHub Actions secrets named `AWS_ACCESS_KEY_ID` and `AWS_SECRET_ACCESS_KEY`.
#    See the documentation for each action used below for the recommended IAM policies for this IAM user,
#    and best practices on handling the access key credentials.

name: Deploy to Amazon ECS

on:
  push:
    branches: [ "main" ]

env:
  AWS_REGION: MY_AWS_REGION                   # set this to your preferred AWS region, e.g. us-west-1
  ECR_REPOSITORY: MY_ECR_REPOSITORY           # set this to your Amazon ECR repository name
  ECS_SERVICE: MY_ECS_SERVICE                 # set this to your Amazon ECS service name
  ECS_CLUSTER: MY_ECS_CLUSTER                 # set this to your Amazon ECS cluster name
  ECS_TASK_DEFINITION: MY_ECS_TASK_DEFINITION # set this to the path to your Amazon ECS task definition
                                               # file, e.g. .aws/task-definition.json
  CONTAINER_NAME: MY_CONTAINER_NAME           # set this to the name of the container in the
                                               # containerDefinitions section of your task definition

permissions:
  contents: read

jobs:
  deploy:
    name: Deploy
    runs-on: ubuntu-latest
    environment: production

    steps:
    - name: Checkout
      uses: actions/checkout@v3

    - name: Configure AWS credentials
      uses: aws-actions/configure-aws-credentials@v1
      with:
        aws-access-key-id: ${{ secrets.AWS_ACCESS_KEY_ID }}
        aws-secret-access-key: ${{ secrets.AWS_SECRET_ACCESS_KEY }}
        aws-region: ${{ env.AWS_REGION }}

    - name: Login to Amazon ECR
      id: login-ecr
      uses: aws-actions/amazon-ecr-login@v1

    - name: Build, tag, and push image to Amazon ECR
      id: build-image
      env:
        ECR_REGISTRY: ${{ steps.login-ecr.outputs.registry }}
        IMAGE_TAG: ${{ github.sha }}
      run: |
        # Build a docker container and
        # push it to ECR so that it can
        # be deployed to ECS.
        docker build -t $ECR_REGISTRY/$ECR_REPOSITORY:$IMAGE_TAG .
        docker push $ECR_REGISTRY/$ECR_REPOSITORY:$IMAGE_TAG
        echo "::set-output name=image::$ECR_REGISTRY/$ECR_REPOSITORY:$IMAGE_TAG"

    - name: Fill in the new image ID in the Amazon ECS task definition
      id: task-def
      uses: aws-actions/amazon-ecs-render-task-definition@v1
      with:
        task-definition: ${{ env.ECS_TASK_DEFINITION }}
        container-name: ${{ env.CONTAINER_NAME }}
        image: ${{ steps.build-image.outputs.image }}

    - name: Deploy Amazon ECS task definition
      uses: aws-actions/amazon-ecs-deploy-task-definition@v1
      with:
        task-definition: ${{ steps.task-def.outputs.task-definition }}
        service: ${{ env.ECS_SERVICE }}
        cluster: ${{ env.ECS_CLUSTER }}
        wait-for-service-stability: true
이제 설정을 바꿔줘야하는데 그 전에 몇가지 기억해야할 점이 있다.
간단한 도커 이미지를 만들어서 도커허브에 올려본 사람은 알겠지만 보통 도커로 배포를 하게 되면 "docker build"로 이미지를 만들고 "docker run"으로 컨테이너를 생성을 한다.
그래서 이 두가지 명령어를 돌릴 때마다 환경변수를 끼워서 보내줘야한다는 걸 알아야한다
빌드와 런, 다른 두 상황에 필요한 환경변수를 aws.yml 템플릿 파일에도 각각 적어줘야한다 거기다가 도커파일에도 각각 적어줘야해서 총 4번 적어줘야한다
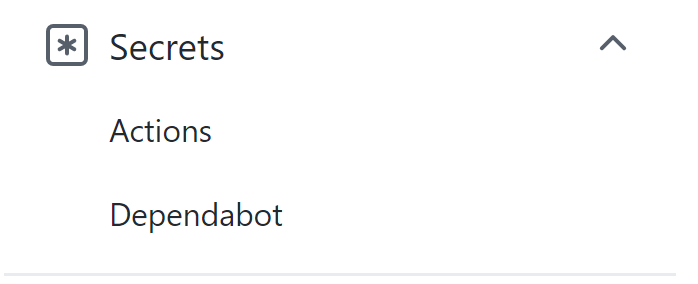
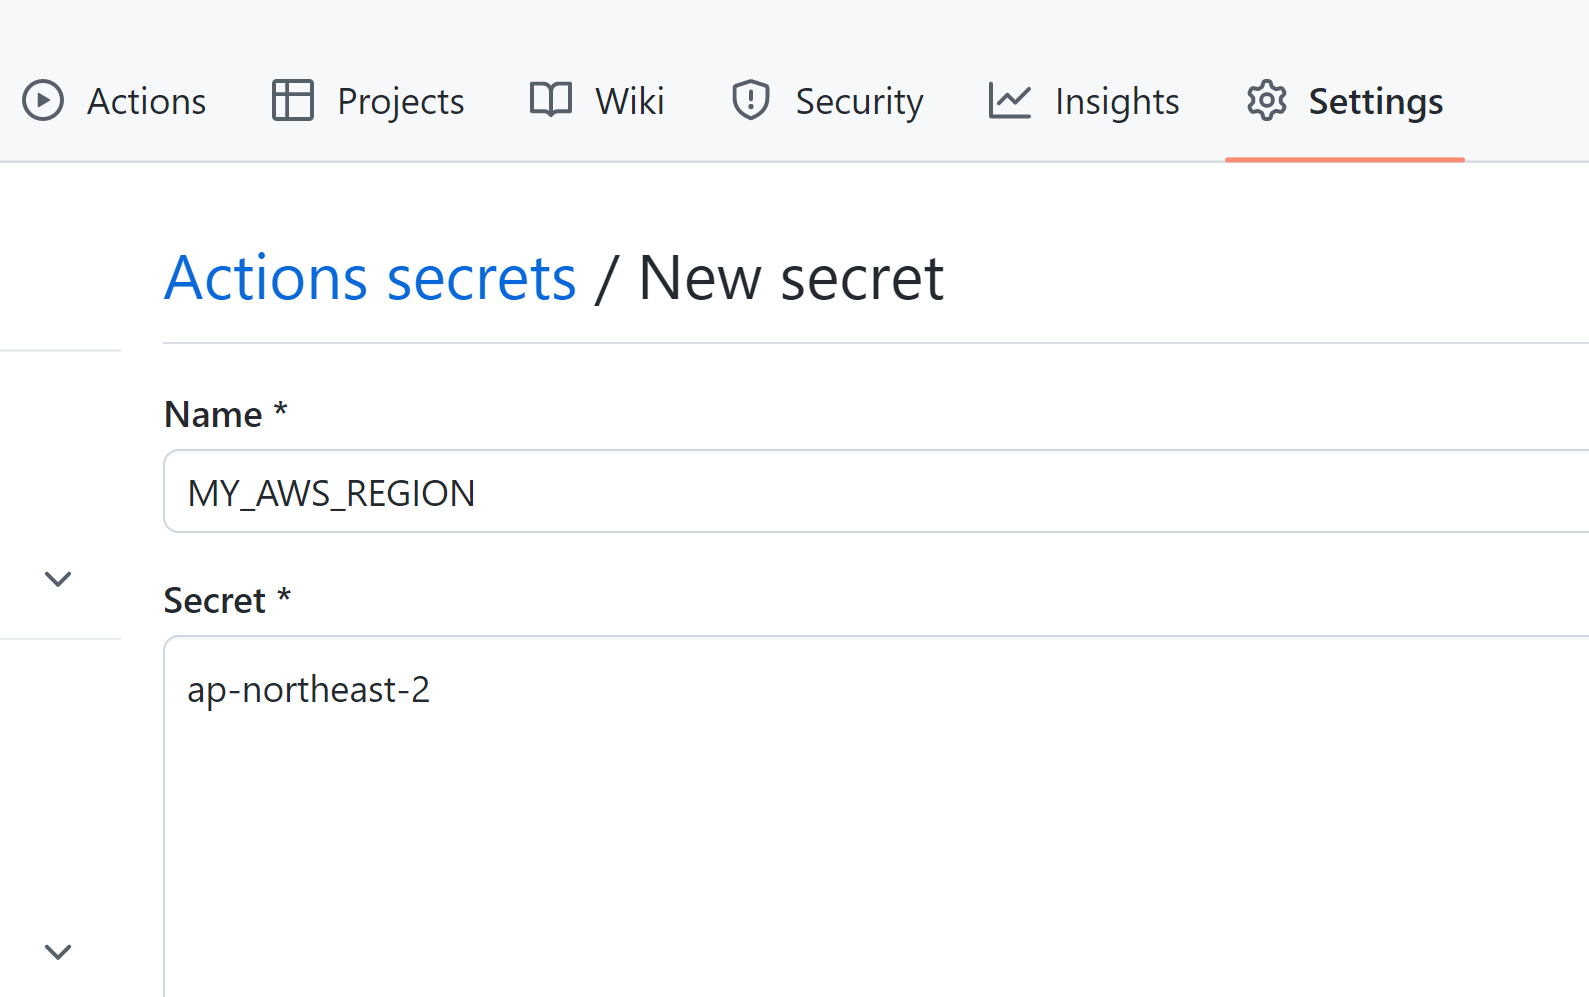
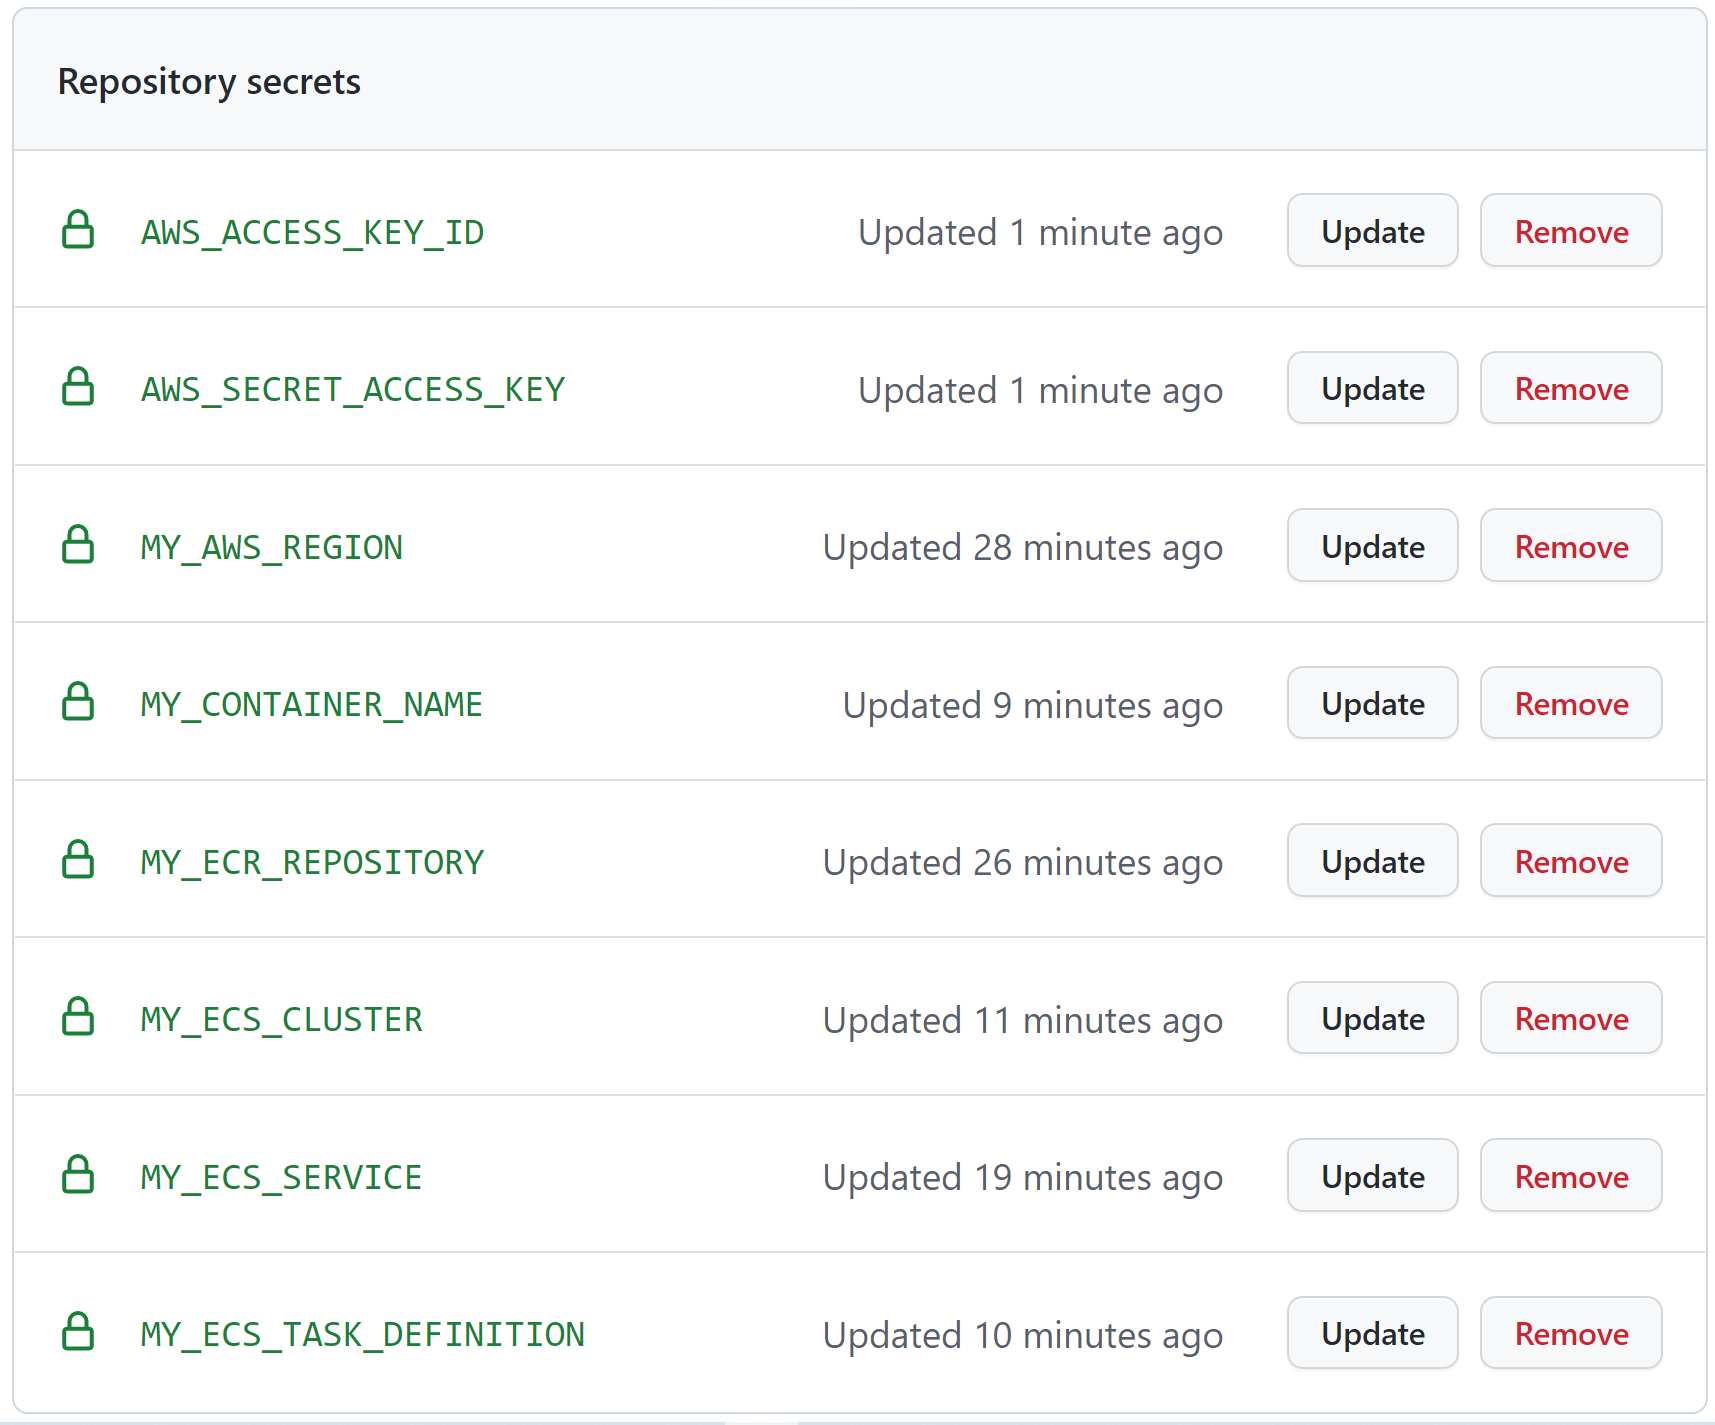
우선 깃헙 시크릿에 환경변수를 설정해줘야한다
시크릿 탭으로 간다
각각의 정보들을 ECR와 ECS에서 찾아서 넣어준다
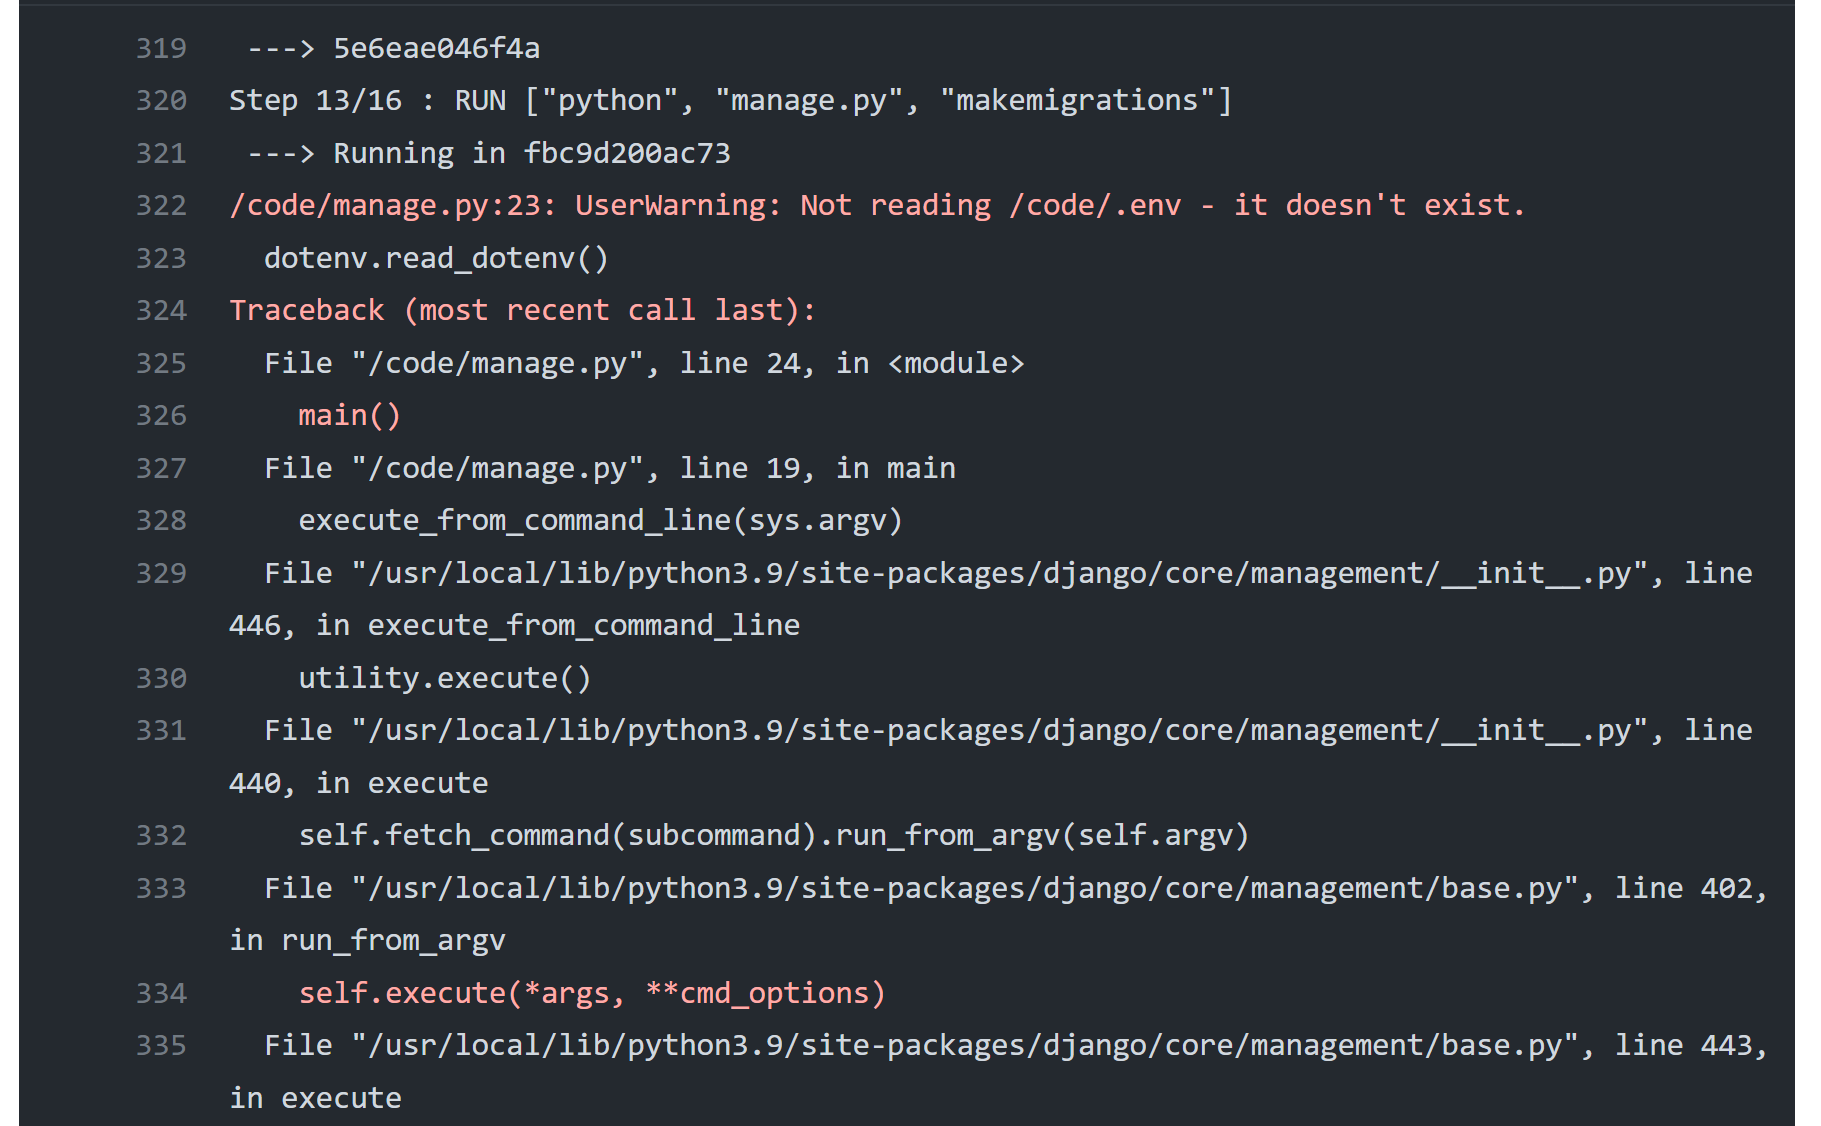
처음엔 yml파일의 env에 환경변수를 넣어주고 실행했는데 에러가 났다

환경변수를 각각의 상황에 맞춰 2번 넣지 않았기 때문이다. 이제 yml파일에 환경변수를 넣어주겠다.
- env쪽은 run 명령어에 들어갈 환경변수가 들어가고
- Login to Amazon ECR 쪽에 build 명령어에 들어갈 환경변수가 들어간다
또한 공식 깃허브 업데이트 대로 task-definition쪽도 수정해줘야한다....이건 템플릿이 업데이트가 안된 문제다. aws ecs describe-task-definition --task-definition $ECS_TASK_DEFINITION --query taskDefinition > task-definition.json 이 부분을 수정해주었다. 공식 참고: https://github.com/aws-actions/amazon-ecs-deploy-task-definition
# This workflow will build and push a new container image to Amazon ECR,
# and then will deploy a new task definition to Amazon ECS, when there is a push to the "main" branch.
#
# To use this workflow, you will need to complete the following set-up steps:
#
# 1. Create an ECR repository to store your images.
#    For example: `aws ecr create-repository --repository-name my-ecr-repo --region us-east-2`.
#    Replace the value of the `ECR_REPOSITORY` environment variable in the workflow below with your repository's name.
#    Replace the value of the `AWS_REGION` environment variable in the workflow below with your repository's region.
#
# 2. Create an ECS task definition, an ECS cluster, and an ECS service.
#    For example, follow the Getting Started guide on the ECS console:
#      https://us-east-2.console.aws.amazon.com/ecs/home?region=us-east-2#/firstRun
#    Replace the value of the `ECS_SERVICE` environment variable in the workflow below with the name you set for the Amazon ECS service.
#    Replace the value of the `ECS_CLUSTER` environment variable in the workflow below with the name you set for the cluster.
#
# 3. Store your ECS task definition as a JSON file in your repository.
#    The format should follow the output of `aws ecs register-task-definition --generate-cli-skeleton`.
#    Replace the value of the `ECS_TASK_DEFINITION` environment variable in the workflow below with the path to the JSON file.
#    Replace the value of the `CONTAINER_NAME` environment variable in the workflow below with the name of the container
#    in the `containerDefinitions` section of the task definition.
#
# 4. Store an IAM user access key in GitHub Actions secrets named `AWS_ACCESS_KEY_ID` and `AWS_SECRET_ACCESS_KEY`.
#    See the documentation for each action used below for the recommended IAM policies for this IAM user,
#    and best practices on handling the access key credentials.

name: Deploy to Amazon ECS

on:
  push:
    branches: [ "main" ]

env:
  AWS_REGION: ${{ secrets.MY_AWS_REGION }}                   # set this to your preferred AWS region, e.g. us-west-1
  ECR_REPOSITORY: ${{ secrets.MY_ECR_REPOSITORY }}           # set this to your Amazon ECR repository name
  ECS_SERVICE: ${{ secrets.MY_ECS_SERVICE }}                 # set this to your Amazon ECS service name
  ECS_CLUSTER: ${{ secrets.MY_ECS_CLUSTER  }}                # set this to your Amazon ECS cluster name
  ECS_TASK_DEFINITION: ${{ secrets.MY_ECS_TASK_DEFINITION }} # set this to the path to your Amazon ECS task definition
  CONTAINER_NAME: ${{ secrets.MY_CONTAINER_NAME  }}          # set this to the name of the container in the                                                          # containerDefinitions section of your task definition
  SECRET_KEY: ${{ secrets.SECRET_KEY }}                      # django secret key
  DEBUG: ${{ secrets.DEBUG }}
  db: ${{ secrets.db }}                                      # db
  DB_NAME: ${{ secrets.DB_NAME }}
  DB_USER: ${{ secrets.DB_USER }}
  DB_PASSWORD: ${{ secrets.DB_PASSWORD }}
  DB_HOST: ${{ secrets.DB_HOST }}
  DB_PORT: ${{ secrets.DB_PORT }}
  SOCIAL_AUTH_GOOGLE_CLIENT_ID: ${{ secrets.SOCIAL_AUTH_GOOGLE_CLIENT_ID }}
  SOCIAL_AUTH_GOOGLE_SECRET: ${{ secrets.SOCIAL_AUTH_GOOGLE_SECRET }}
  STATE: ${{ secrets.STATE }}

permissions:
  contents: read

jobs:
  deploy:
    name: Deploy
    runs-on: ubuntu-latest
    environment: production

    steps:
    - name: Checkout
      uses: actions/checkout@v3

    - name: Configure AWS credentials
      uses: aws-actions/configure-aws-credentials@v1
      with:
        aws-access-key-id: ${{ secrets.AWS_ACCESS_KEY_ID }}
        aws-secret-access-key: ${{ secrets.AWS_SECRET_ACCESS_KEY }}
        aws-region: ${{ env.AWS_REGION }}

    - name: Login to Amazon ECR
      id: login-ecr
      uses: aws-actions/amazon-ecr-login@v1

    - name: Build, tag, and push image to Amazon ECR
      id: build-image
      env:
        ECR_REGISTRY: ${{ steps.login-ecr.outputs.registry }}
        IMAGE_TAG: ${{ github.sha }}
        SECRET_KEY: ${{ secrets.SECRET_KEY }}
        DEBUG: ${{ secrets.DEBUG }}
        db: ${{ secrets.db }}
        DB_NAME: ${{ secrets.DB_NAME }}
        DB_USER: ${{ secrets.DB_USER }}
        DB_PASSWORD: ${{ secrets.DB_PASSWORD }}
        DB_HOST: ${{ secrets.DB_HOST }}
        DB_PORT: ${{ secrets.DB_PORT }}
        SOCIAL_AUTH_GOOGLE_CLIENT_ID: ${{ secrets.SOCIAL_AUTH_GOOGLE_CLIENT_ID }}
        SOCIAL_AUTH_GOOGLE_SECRET: ${{ secrets.SOCIAL_AUTH_GOOGLE_SECRET }}
        STATE: ${{ secrets.STATE }}
      run: |
        # Build a docker container and
        # push it to ECR so that it can
        # be deployed to ECS.
        # python -c 'import os;print(os.environ)'
        docker build --build-arg SECRET_KEY \
                    --build-arg DB_USER \
                    --build-arg DEBUG \
                    --build-arg DB_NAME \
                    --build-arg DB_USER \
                    --build-arg DB_PASSWORD \
                    --build-arg DB_HOST \
                    --build-arg DB_PORT \
                    --build-arg db \
                    --build-arg SOCIAL_AUTH_GOOGLE_CLIENT_ID \
                    --build-arg SOCIAL_AUTH_GOOGLE_SECRET \
                    -t $ECR_REGISTRY/$ECR_REPOSITORY:$IMAGE_TAG .
        docker push $ECR_REGISTRY/$ECR_REPOSITORY:$IMAGE_TAG
        echo "::set-output name=image::$ECR_REGISTRY/$ECR_REPOSITORY:$IMAGE_TAG"

    - name: Download task definition
      run: |
        aws ecs describe-task-definition --task-definition $ECS_TASK_DEFINITION --query taskDefinition > task-definition.json

    - name: Fill in the new image ID in the Amazon ECS task definition
      id: task-def
      uses: aws-actions/amazon-ecs-render-task-definition@v1
      with:
        task-definition: task-definition.json
        container-name: ${{ env.CONTAINER_NAME }}
        image: ${{ steps.build-image.outputs.image }}

    - name: Deploy Amazon ECS task definition
      uses: aws-actions/amazon-ecs-deploy-task-definition@v1
      with:
        task-definition: ${{ steps.task-def.outputs.task-definition }}
        service: ${{ env.ECS_SERVICE }}
        cluster: ${{ env.ECS_CLUSTER }}
        wait-for-service-stability: true
이 부분이 빌드 시 환경변수를 넣어주는 부분이다
docker build --build-arg SECRET_KEY \
                    --build-arg DB_USER \
                    --build-arg DEBUG \
                    --build-arg DB_NAME \
                    --build-arg DB_USER \
                    --build-arg DB_PASSWORD \
                    --build-arg DB_HOST \
                    --build-arg DB_PORT \
                    --build-arg db \
                    --build-arg SOCIAL_AUTH_GOOGLE_CLIENT_ID \
                    --build-arg SOCIAL_AUTH_GOOGLE_SECRET \
                    -t $ECR_REGISTRY/$ECR_REPOSITORY:$IMAGE_TAG .
        docker push $ECR_REGISTRY/$ECR_REPOSITORY:$IMAGE_TAG
        echo "::set-output name=image::$ECR_REGISTRY/$ECR_REPOSITORY:$IMAGE_TAG"
이제 도커파일도 수정해야한다
FROM node:16-alpine as FRONTEND
COPY frontend /code/backend/frontend/
WORKDIR /code/backend/frontend

RUN yarn install \
    && yarn run build

FROM python:3.9-alpine

RUN mkdir /code
WORKDIR /code
COPY ./backend/ /code/backend/
COPY --from=FRONTEND /code/backend/frontend/src/App.tsx .


RUN apk add --no-cache gcc musl-dev postgresql-dev curl
RUN pip install -r /code/backend/requirements/production.txt
EXPOSE 8000
WORKDIR /code/backend

ARG SECRET_KEY
ARG DEBUG
ARG db
ARG DB_NAME
ARG DB_USER
ARG DB_PASSWORD
ARG DB_HOST
ARG DB_PORT
ARG SOCIAL_AUTH_GOOGLE_CLIENT_ID
ARG SOCIAL_AUTH_GOOGLE_SECRET

ENV SECRET_KEY=${SECRET_KEY} DEBUG=${DEBUG} db=${db} \
    DB_NAME=${DB_NAME} DB_USER=${DB_USER} DB_PASSWORD=${DB_PASSWORD} DB_HOST=${DB_HOST} DB_PORT=${DB_PORT} \
    SOCIAL_AUTH_GOOGLE_CLIENT_ID=${SOCIAL_AUTH_GOOGLE_CLIENT_ID} SOCIAL_AUTH_GOOGLE_SECRET=${SOCIAL_AUTH_GOOGLE_SECRET}

RUN ["python", "manage.py", "makemigrations"]

RUN ["python", "manage.py", "migrate"]

ENTRYPOINT [ "python", "manage.py", "runserver", "0.0.0.0:8000" ]
환경변수면 env 아닌가? 왜 arg를 쓰는거지? 할 수 도 있는데 arg는 빌드할 때 쓴다
더 알고 싶으면 여길 참고하자: https://github.com/heowc/programming-study/issues/90
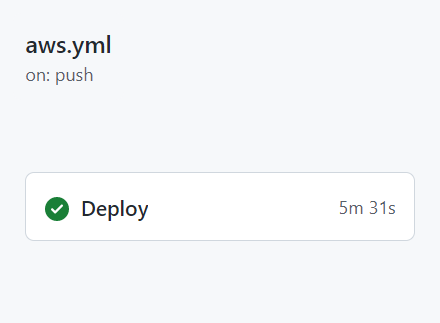
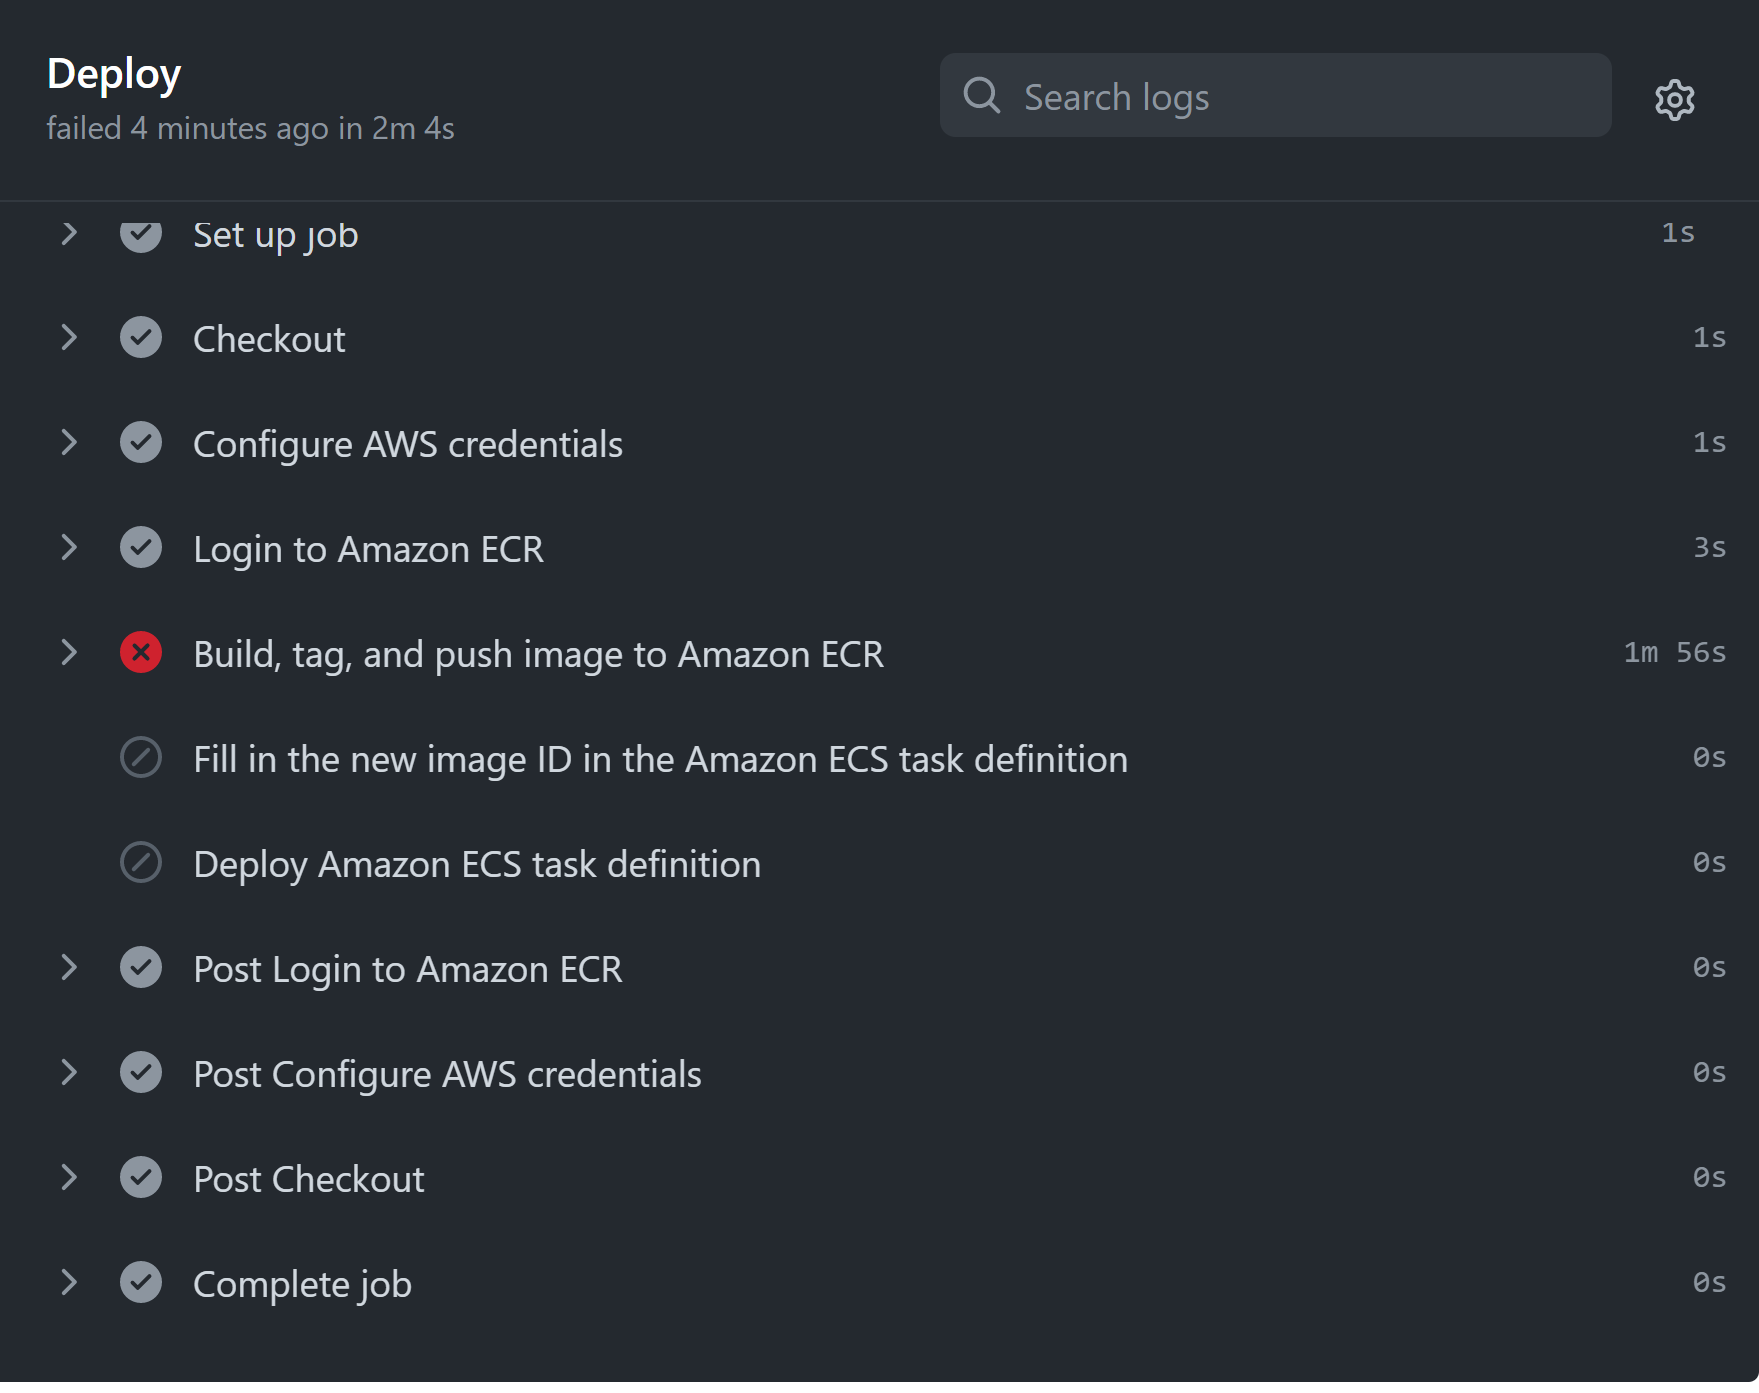
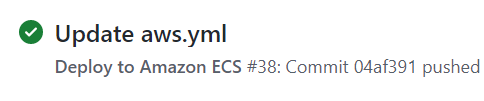
푸쉬하고 actions 탭으로 가본다 배포 성공!
무려 5분 31초나 걸려서 자동 배포시켜주었다