[AWS] How to Create VPC Step by Step


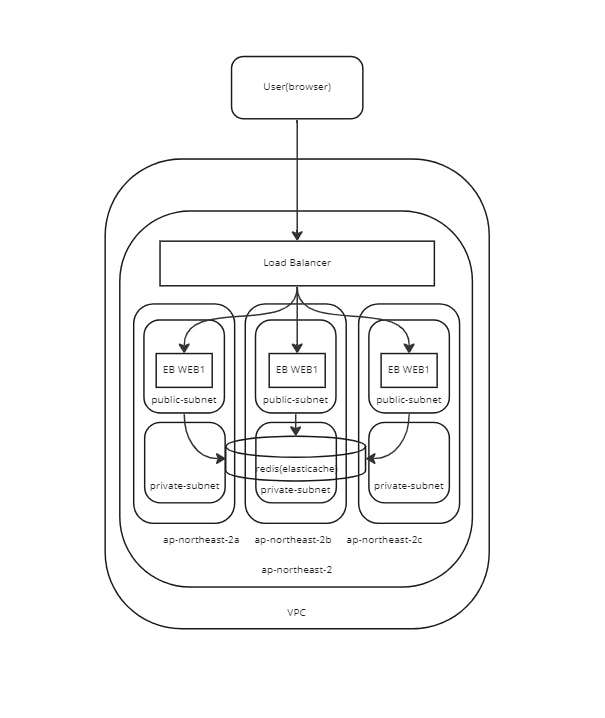
When setting up AWS server, most books & tutorials teach you to create EC2 instance first, but that is for simple apps. What I needed to do for my website with chat system first was to create VPC. If you see the AWS infrastructure architecture that I drew, you can see why. (In the diagram I use Elastic Beanstalk(EB) rather than EC2 but the idea is the same.) The instance is surrounded by VPC so VPC should be created first. Think of VPC as an environment for your instance. This architecture includes redis(elasticache) so if you are not using it you can skip it.
VPC
We will create VPC step by step.
- Press "create VPC" button

- You will see this page
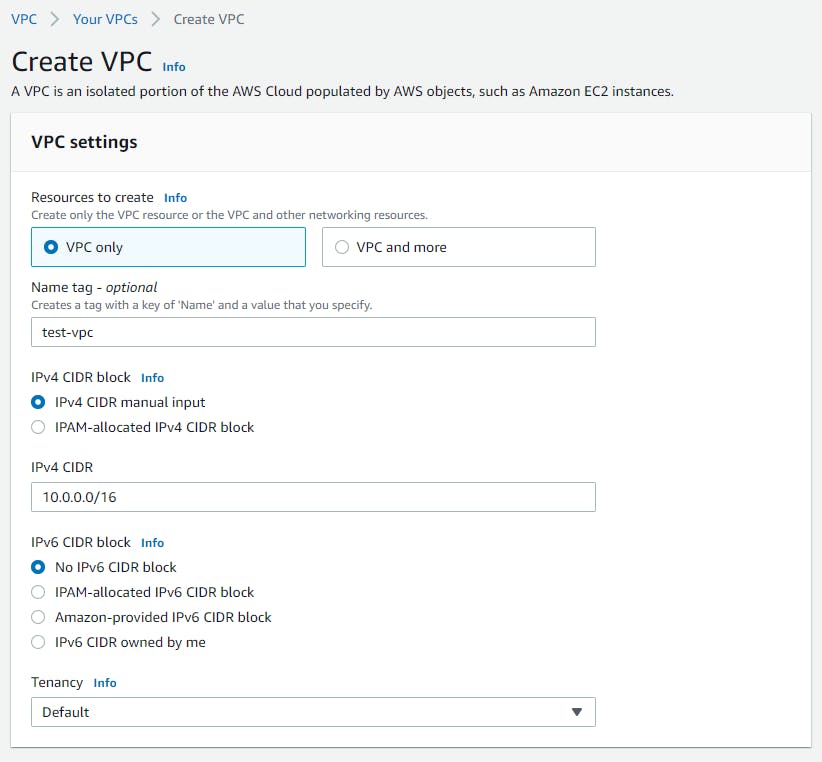
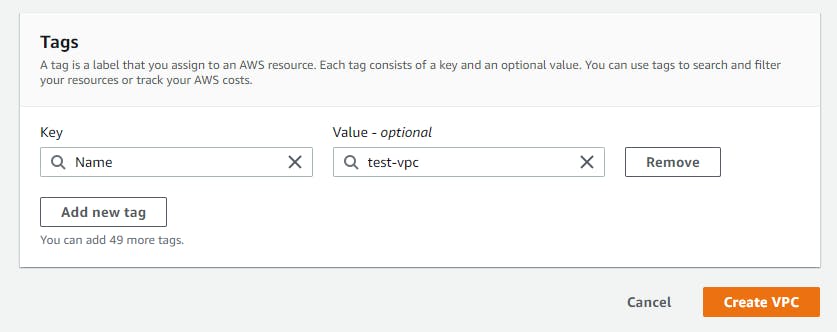
Name tag: [my_name]_vpc
IPv4 CIDR: 10.0.0.0/16
(CIDR doesn't need to be 10.0.0.0/16 You can decide your IPv4 range)
Quick and Easy Way
You can also select "VPC and more" instead of "VPC" to check the preview
This will autogenerate everything including subnet, internet gateway, route tables, NAT gateway, etc.
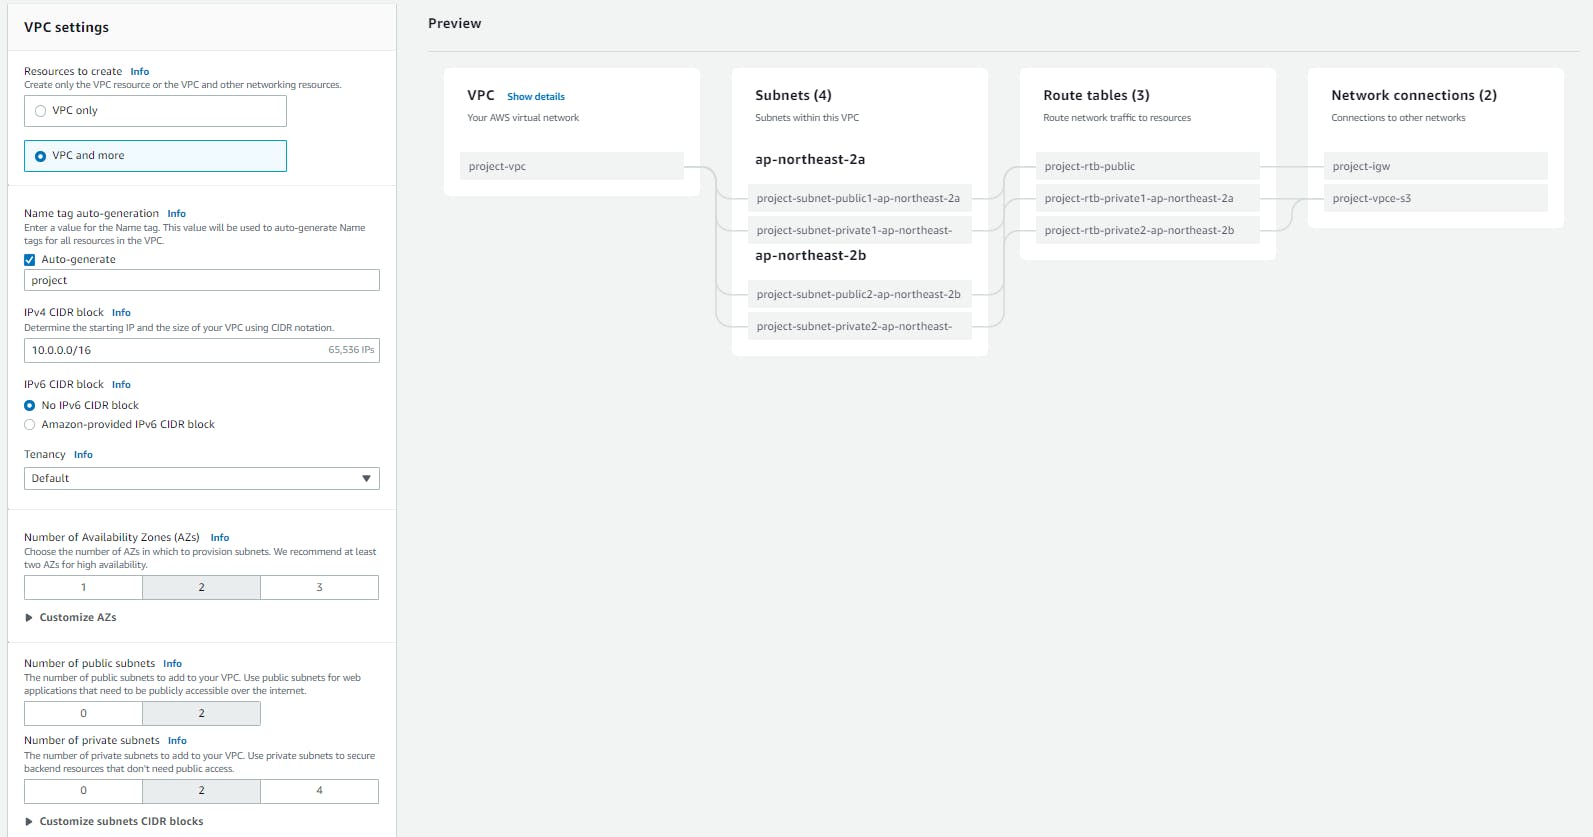
You are strongly recommended to use more than 1 Availability Zone
For each Availability Zone, there is an instance
For every instance there's a public subnet and private subnet
Extra Tips:
Choose a and c for Availability Zone if you are using Elastic Beanstalk
To differentiate public and private subnet, we will change subnet CIDR. You don't need to follow this but this makes your life easier.
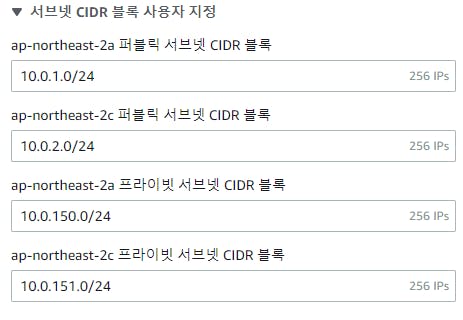
- so when we see CIDR have 1 or 2 or any one digit, then we will know it will be public subnet, and private subnet will start from 150
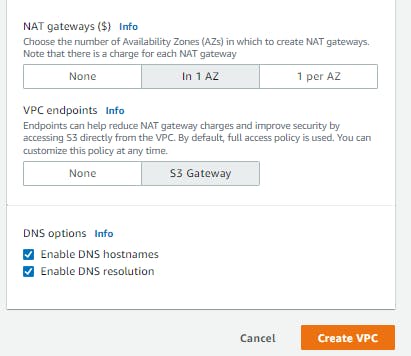
NAT gateway is for private subnet to connect to services outside your VPC
Select In 1 AZ
- Press "create VPC" button at the end of the page
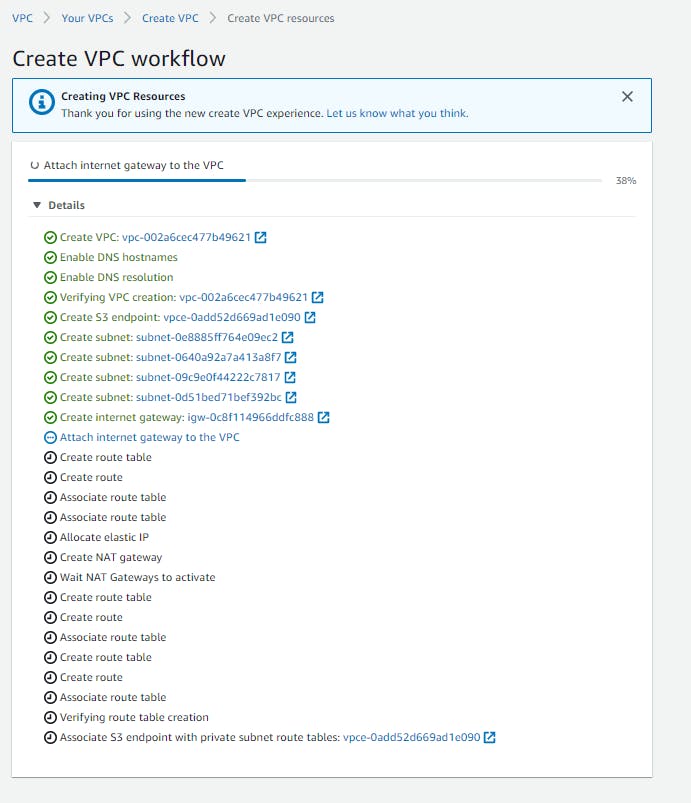
- Wait until the VPC is created
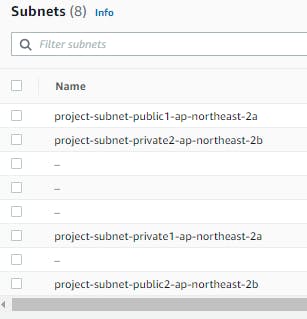
Subnet
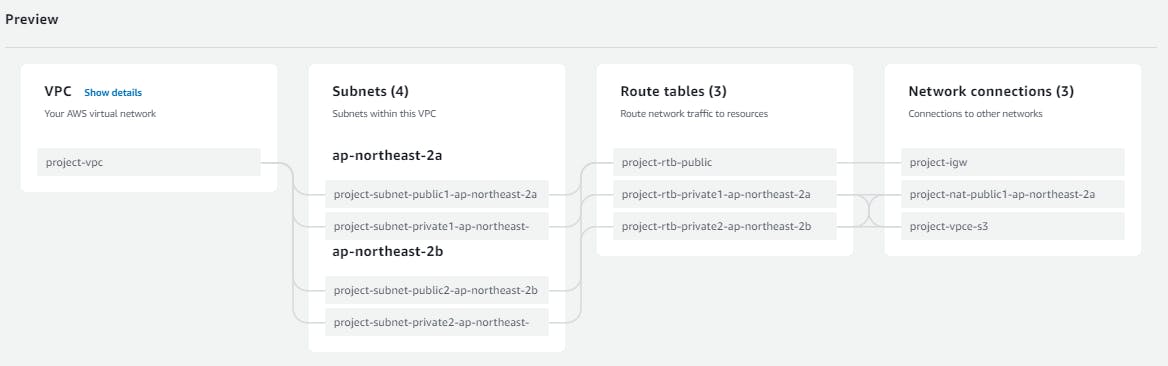
If you clicked "VPC and more" when creating VPC, then everything is autogenerated like this.
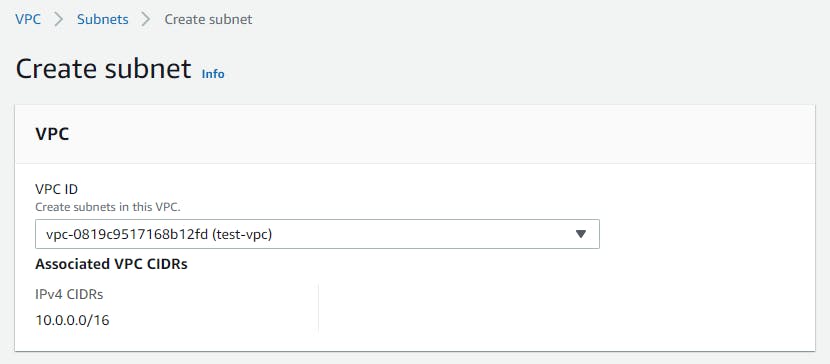
Here I will show you how to create subnet if you clicked "VPC". This way you get to configure subnet IPv4.
Harder Way
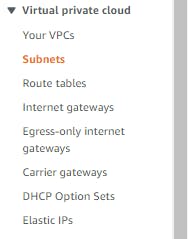
- Click Subnet from the sidebar
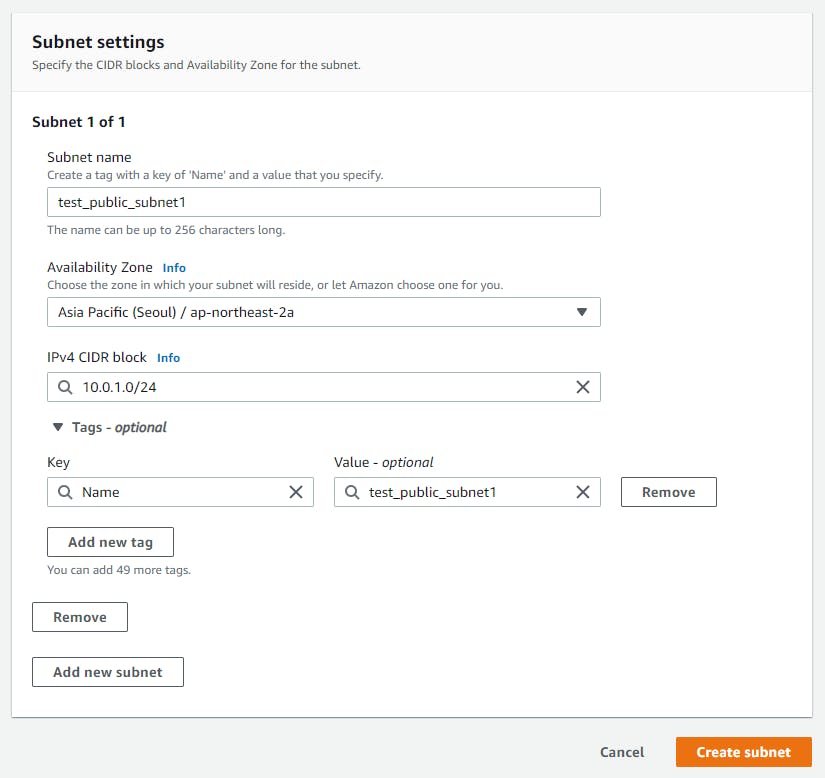
Name tag: [my_name]_public_subnet01
VPC: VPC name we just created
Availability Zone: ap-northeast-1a
IPv4 CIDR: 10.0.1.0/24
Since we have one more availability zone, we will create one more.
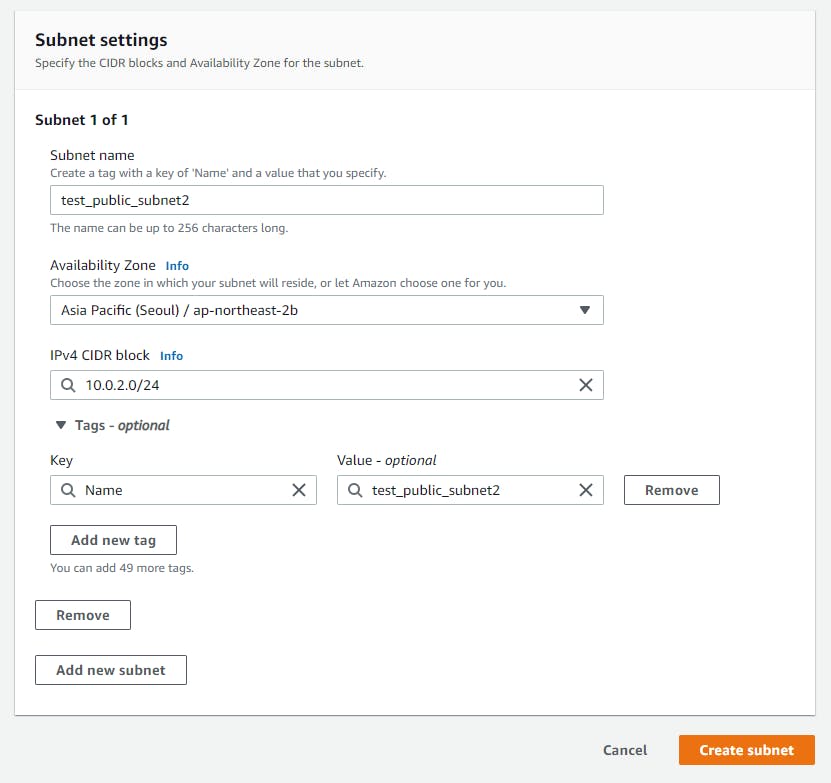
Name tag: [my_name]_public_subnet02
VPC: VPC name we just created
Availability Zone: ap-northeast-1b
IPv4 CIDR: 10.0.2.0/24
Do the same for 2 private subnets
but for IPv4 CIDR we will type a higher number so that we can distinguish the private subnets from the public subnets
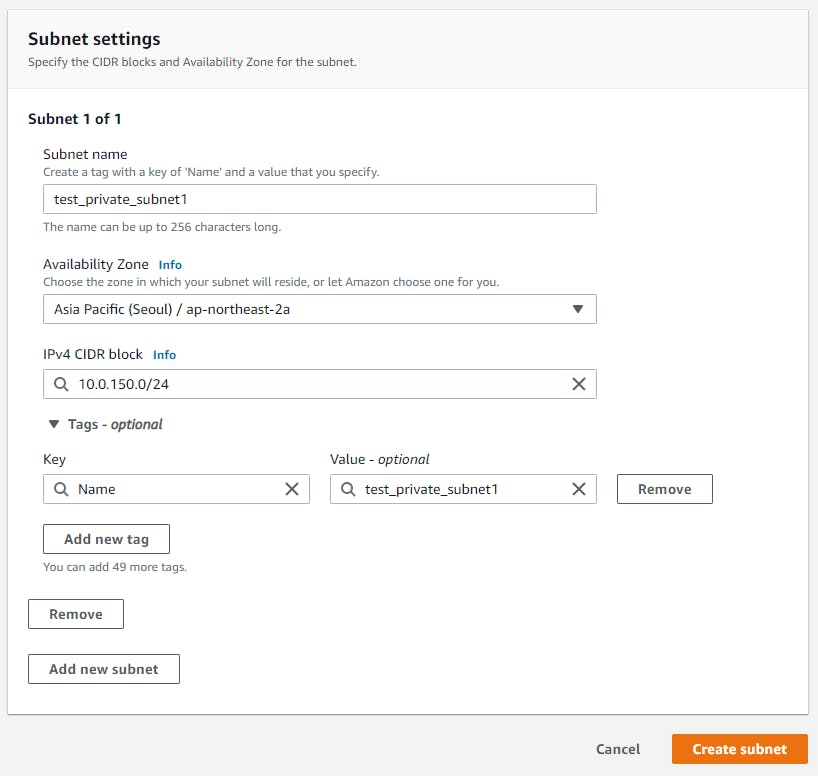
Name tag: [my_name]_private_subnet01
VPC: VPC name we just created
Availability Zone: ap-northeast-1a
IPv4 CIDR: 10.0.150.0/24
Name tag: [my_name]_private_subnet02
VPC: VPC name we just created
Availability Zone: ap-northeast-1b
IPv4 CIDR: 10.0.151.0/24
Internet Gateway
- An internet gateway is a virtual router that connects a VPC to the internet.
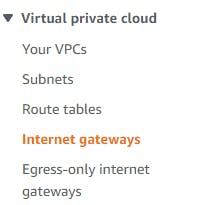
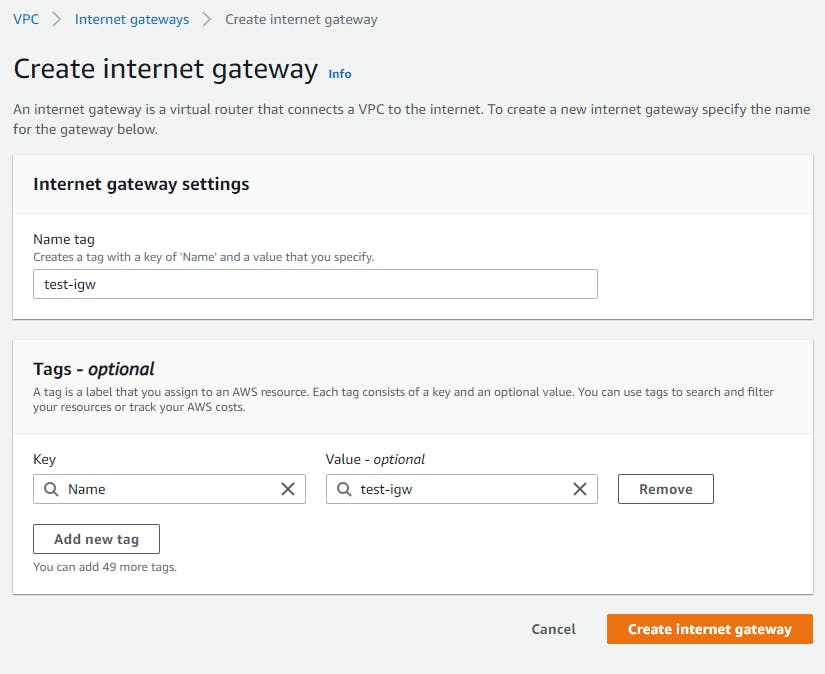
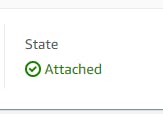
- After creating the internet gateway, we will attach to VPC

From the dashboard, check if the state is attached
NAT Gateway


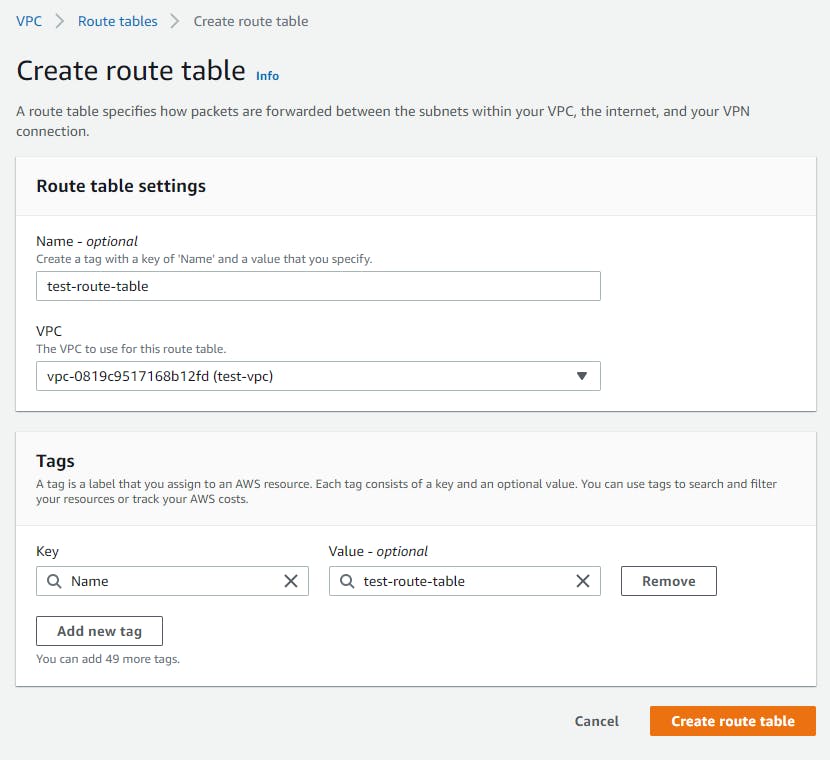
Route Table
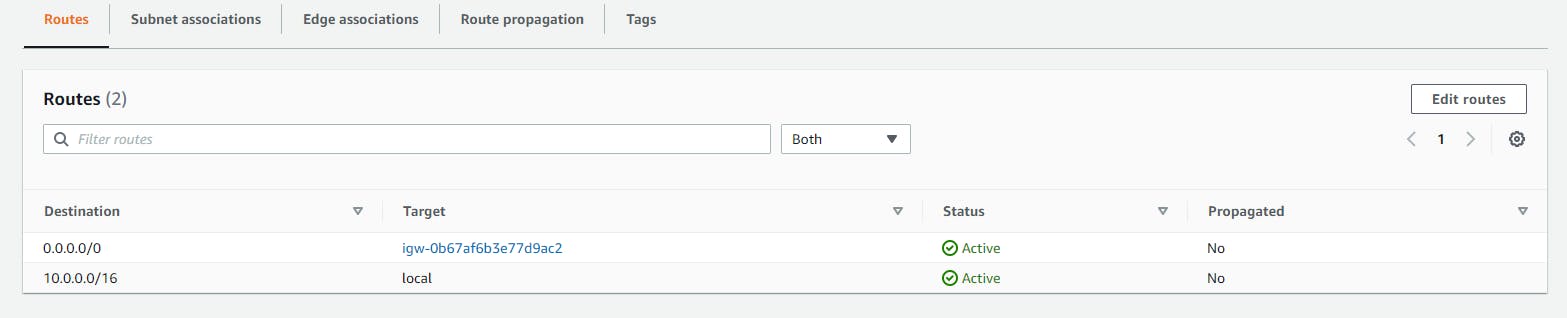
- A route table specifies how packets are forwarded between the subnets within your VPC, the internet, and your VPN connection.
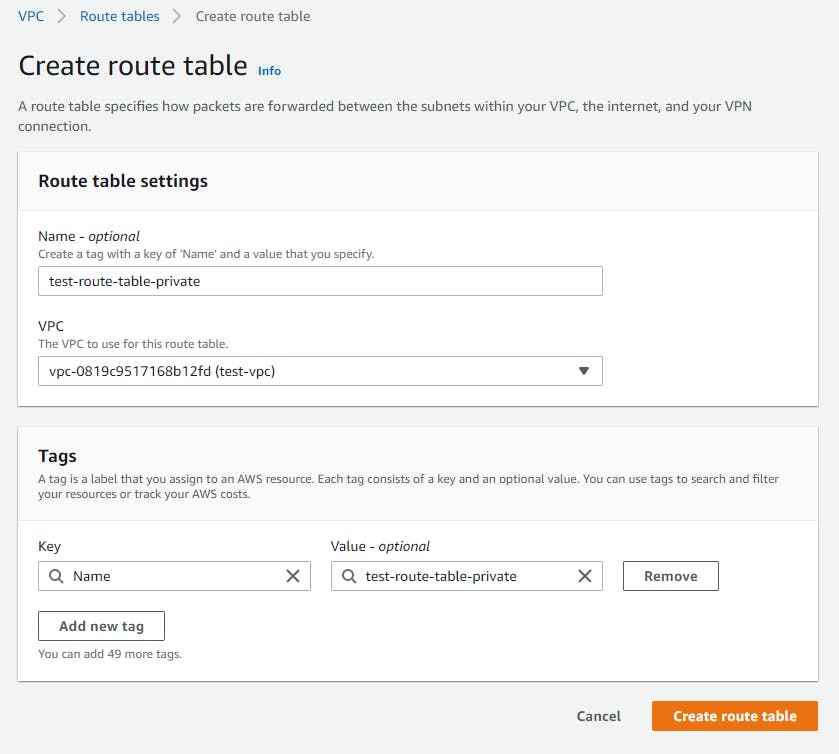
- Click create route table

- Go to Routes > Edit routes
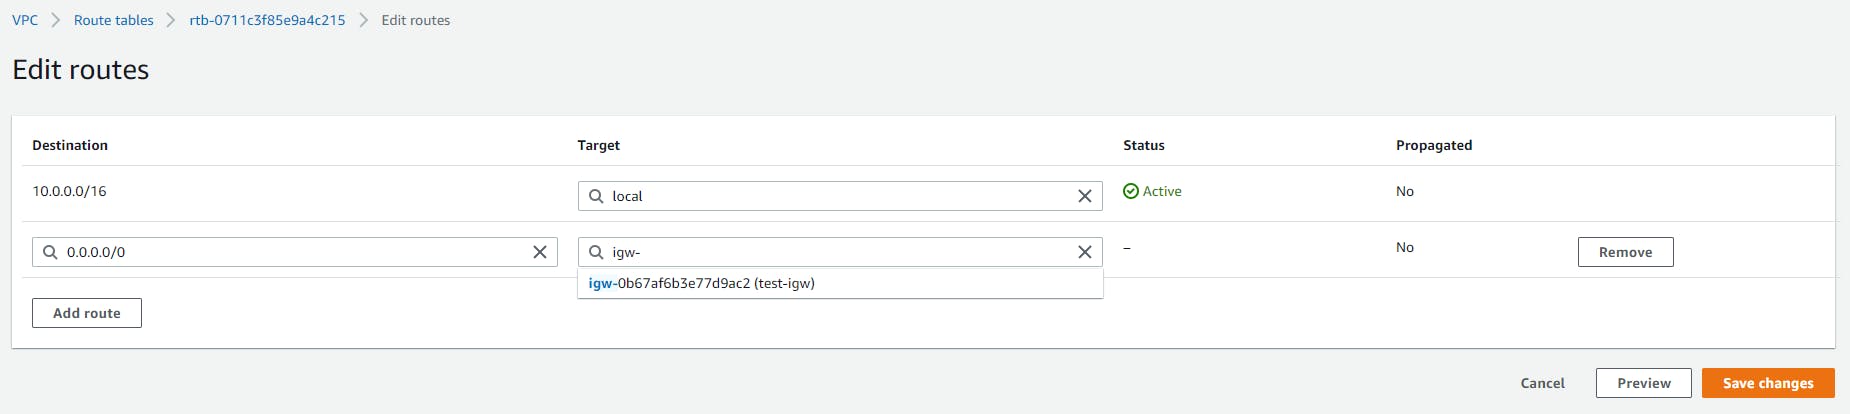
Destination: 0.0.0.0/0
Target: Our IGW name
This is how you can set up and configure your VPC. Now you can setup your EC2.